Light, tender crepes make a simple, elegant option when you want something lighter than pancakes but just as satisfying. These thin layers work sweet or savory and highlight your favorite fillings with a neutral taste.
Consistency matters. Aim for a pourable batter the thickness of half-and-half—thicker than milk, thinner than cream. Use common ingredients like flour, milk, eggs, and a cup measure to get reliable results.
Rest the batter at least one hour, or overnight, to boost elasticity and make flipping easier. A nonstick skillet, crepe pan, or well-seasoned cast iron over medium heat works best. Lightly grease the surface and use the first crepe to test heat.
Make-ahead convenience: Cooked gluten-free crepe recipes for breakfast and keep them in the fridge 3–5 days or freeze 1–2 months. Dairy-free milk and vegan butter are fine substitutes. Some bakers skip gums; others use a 1:1 blend with xanthan gum for stability.
Key Notes;
- Thin, tender crepes offer a lighter alternative to pancakes.
- Batter should pour like half-and-half and rest at least one hour.
- Use a nonstick skillet or crepe pan; the first one is your tester.
- Make ahead: refrigerate 3–5 days or freeze 1–2 months.
- Dairy-free milk and different flour blends work well.
Why These Gluten-Free Crepes Belong on Your Breakfast Table
Paper-thin layers deliver a light mouthfeel while holding fillings firmly in place. The right ratio of eggs, milk fat, and melted butter makes sheets that look delicate but bend and roll without tearing.
Light, thin, and delicate—without falling apart
Balance matters. A fluid batter plus a short rest builds elasticity. That strength lets you fold or roll each crepe while keeping a thin, tender center and buttery crisp edge.
Neutral flavor so sweet or savory fillings shine
Keep sugar minimal to preserve flavor clarity. The neutral base pairs with lemon and berries or ham and gruyere alike. Small amounts of fat add tenderness without heaviness.
- Fast cook time: Each crepe takes moments, ideal for weekday or special-occasion breakfasts.
- Technique tip: Lightly grease the pan and keep heat steady for even browning.
| Ingredient | Effect on Texture | Why It Matters |
|---|---|---|
| Eggs | Structure and flexibility | Bind sheets so they roll without tearing |
| Milk / Fat | Tenderness and crisp edges | Small fat keeps crepe soft yet lightly crisp |
| Sugar | Subtle sweetness | Use sparingly to let toppings stand out |
| Flour choice | Tenderness vs. snap | Select blend based on desired bite |
Key Ingredients for a Reliable Gluten-Free Crepe Batter
Choose a reliable mix of flours and binders to make a batter that pours thin and stays flexible.
Flour pathways and measuring
Two proven routes exist: a gum-free blend (superfine white rice flour, potato starch, tapioca starch) gives ultra-delicate sheets. Alternatively, use a high-quality 1:1 blend with xanthan gum (King Arthur, Bob’s Red Mill) for added elasticity.
Weigh your flour to prevent dense or rubbery results caused by too much starch.
Binders, milk, and fat
Eggs act as binder and mild leavener, forming structure so the layers roll without baking powder. Use whole milk for tenderness and flavor, or unsweetened plant milk to keep the batter balanced.
Melted butter adds richness and crisp edges; a dairy-free butter substitute works well if you avoid dairy.
Seasoning and balance
Add a small amount of sugar and a splash of vanilla for sweet variations; omit them when making savory versions. A pinch of kosher or flaked sea salt lifts overall flavor and measures consistently.
- Sample ratio context: about 1 cup flour blend to 2 large eggs, 1 to 1¼ cups milk, 2 tablespoons melted butter—adjust to a thin, pourable crepe batter.
- Caution: flavored milk or excess sugar can overwhelm the neutral base and make the batter stick while baking.
Understanding Batter Consistency and Rest Time
Think of the batter as a glossy, fluid ribbon—wide enough to coat the pan, thin enough to flex without tearing. The ideal pourable texture matches half-and-half in thickness. This lets you swirl the pan and get edge-to-edge coverage with minimal fuss.
Rest in the fridge at least one hour. Giving the mixture time lets starches and flour fully hydrate. A one-hour chill reduces tearing and improves tenderness. An overnight rest maximizes stability and helps the layers brown evenly.
Before cooking, bring chilled batter to room temperature and whisk briefly. Cold butter or milk can clump and make lumps. If you see small clumps, re-blend or whisk until smooth.
- Too thick? Add 1 tablespoon of milk or water at a time until pourable.
- Over-thick batter behaves like pancakes and becomes rubbery.
- Use a blender or vigorous whisk to ensure a uniform, lump-free batter.
Make sure to test with a small pour. If coverage is slow or patchy after a few minutes, thin the batter before you commit to a full layer. A smooth ribbon that ribbons off the spoon in steady minutes of pouring is your best indicator.
Essential Pans and Tools for Picture-Perfect Crepes
A steady, well-chosen pan makes the difference between tearing sheets and picture-perfect layers. A nonstick pan, a dedicated crepe pan with low sides, or a well-seasoned cast iron skillet all work well. Pick a pan that fits your stovetop and the diameter you want.
Keep heat steady. Use medium heat so the batter sets quickly without scorching. Preheat the pan for a couple of minutes so the first pour sets on contact and releases cleanly from the bottom.
Grease lightly before each pour. A swipe of butter, a spritz of cooking spray, or a dab of ghee prevents sticking and adds flavor. Even high-quality nonstick surfaces benefit from a thin film of fat across multiple crepes.
Use a blender to make silky batter in seconds; a whisk also works if you beat until no visible lumps remain. Transfer batter to a spouted measuring cup to control the pour and coat the bottom evenly.
- Pan options: nonstick for easy release, crepe pans for low sides and easy swirling, cast iron for superior browning.
- Tools: wide spatula for flips, spouted cup for pouring, and light cloth to wipe residue between batches.
Step-by-Step: The Gluten-Free Crepe Recipe Method
Start with the wet ingredients in the blender. Add eggs, milk, and melted butter first, then top with flour and a pinch of salt. Blend until just smooth to avoid overworking starches and gums.
Rest the crepe batter covered in the fridge for at least one hour or overnight. This hydrates the flour and improves elasticity and browning.
Preheat a 6–9 inch nonstick or cast iron skillet over medium heat for about 2 minutes and apply a light film of fat. Pour roughly 1/4 cup (about 5 tablespoons for a 9-inch pan) into the center, then immediately swirl to coat the bottom thinly.
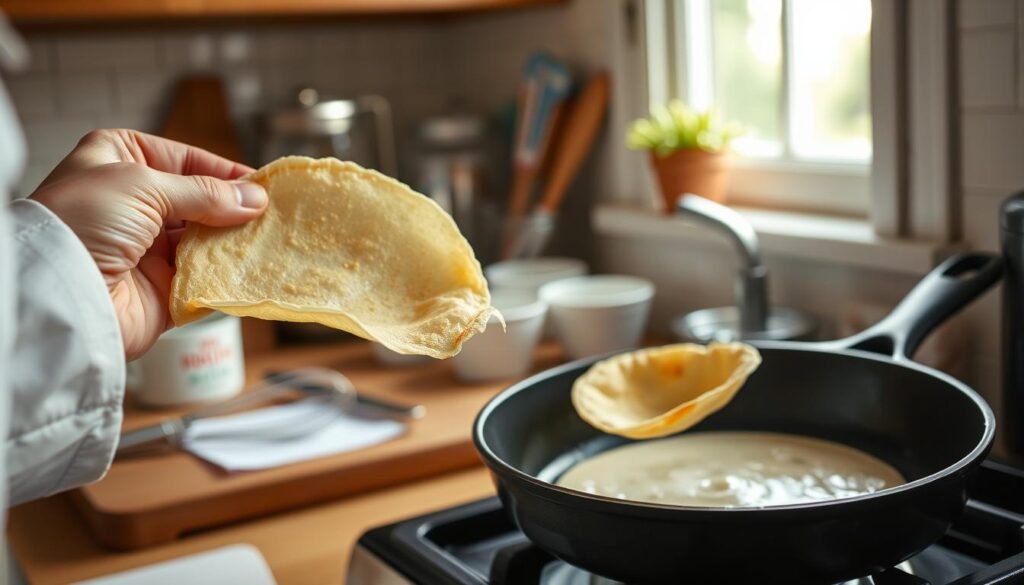
Cook the first side until the edges lift and the underside is pale golden, about 90 seconds. Flip with a wide spatula and cook the second side 30–60 seconds until just set.
- Stack finished crepes on parchment to keep them pliable.
- Re-whisk the mixture occasionally as starch settles.
- Return any remaining batter to the fridge during breaks; bring it to room temperature and stir before resuming.
Keep finished crepes warm in a 175–200°F oven until serving, or cool and store for later use.
gluten-free crepe recipes for breakfast
Make mornings simpler by prepping a smooth batter the night before and portioning it into a spouted cup.
From quick weekday mornings to special occasions: refrigerate the batter up to 24–48 hours and give it a brief stir before use. This restores a pourable texture so the first pour spreads thinly and evenly.
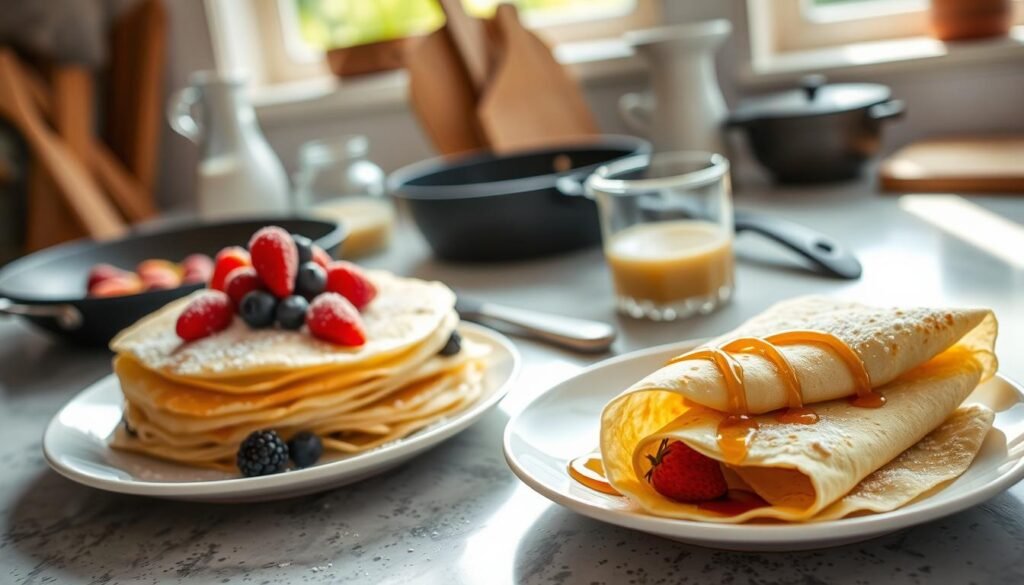
From quick weekday mornings to special occasions
Use a single tester crepe to fine-tune pan heat and greasing. That first layer lets you set a steady minscook rhythm and avoid wasted batter.
Portioning tip: a spouted cup at night saves time and reduces spills. Keep a cup at hand and you can pour each cup into the pan in seconds.
Keep warm in a 175-200°F oven for easy serving
Transfer finished crepes to a baking sheet and hold them in a low oven (175–200°F). This keeps a stack pliable while you cook the remaining batter and prep fillings.
| Task | Why it helps | Quick note |
|---|---|---|
| Rest batter overnight | Improves flow and texture | Re-whisk briefly before pouring |
| Cook a tester | Adjust pan temperature and grease | Sets minscook timing for the batch |
| Keep warm at low oven temp | Maintains pliability for serving | 175–200°F on a baking sheet |
| Portion into spouted cup | Faster, neater pouring | Great when milk and flour separate slightly |
- Weekday friendly: make-ahead batter shortens active time and keeps mornings calm.
- Small-pan tip: smaller layers cook faster and are ideal for kids.
- Menu idea: plan both sweet and savory crepes to please varied tastes at the table.
Sweet Crepe Filling Ideas to Start the Morning Right
Bright syrups and fresh fruit make simple layers sing without extra fuss. Pick a few contrasting fillings to balance texture and flavor. A light drizzle, a soft spread, and a fresh fruit accent are all you need.
Quick syrup options: For a rich lemon syrup, simmer 2 parts sugar to 1 part water and replace one-quarter of the water with fresh lemon juice. Cook about three minutes until slightly thickened, then cool. For a subtler sheen, use a classic 1:1 simple syrup (sugar to water).
- Nutella + fruit: Spread Nutella and add sliced bananas or strawberries for a crowd-pleasing finish.
- Berries & cream: Fill with whipped cream, top with fresh berries and a dusting of powdered sugar.
- Cozy options: Warm apple compote with cinnamon-sugar or a drizzle of chocolate sauce.
- Swipe a minimal amount of butter in the pan to boost caramelized edges.
- Measure syrups by tablespoons and dispense from a spouted cup or thin bottle to avoid sogginess.
Pro tip: The base batter handles both sweet savory ends—add or omit sugar and vanilla to steer the profile. A small amount of eggs in the batter helps structure so fillings stay put when you roll.
Savory Crepes: Protein-Packed Breakfast Options
A neutral batter lets savory flavors take center stage—omit sweeteners and keep fillings bold. That simple swap sets the foundation for savory combinations that are fast, filling, and elegant.

Try a hearty classic: scramble eggs, add crisp bacon, and finish with melty cheese for a protein-forward wrap that travels well.
French-inspired choice: fold warm ham and gruyere into each layer for a simple, satisfying plate. For a luxe option, add smoked salmon and chives with a smear of cream cheese or ricotta.
Veg-forward idea: spread pesto, toss sautéed peppers, onions, and mushrooms, then scatter fresh mozzarella before folding.
- Omit sugar and vanilla in the batter to keep a neutral base.
- Keep gentle heat and a lightly buttered pan to get delicate browning and easy flips.
- Season fillings with salt and herbs; leave the sheet lightly seasoned to preserve tenderness.
- Use a well-hydrated flour blend so rolls and triangles resist cracking under weight.
- Prep fillings ahead and finish with a sprinkle of cheese on warm layers to melt slightly.
“Maintain steady heat and a thin film of butter between layers to keep edges crisp and folds clean.”
Make-Ahead, Storage, and Freezing Tips
A rested batter develops better flow and a more forgiving texture when you cook it the next day. Planning ahead makes weekday service faster and more reliable.
Refrigerate the batter up to 24–48 days depending on ingredients and recipe type. Before cooking, re-whisk to restore a smooth, pourable consistency.
Short-term storage
Store cooked crepes stacked and wrapped in plastic or an airtight container in the fridge for 3–5 days. Label the stack with date and any fillings to keep rotation clear.
Freezing and thawing
Lay layers flat on a baking sheet and freeze until firm. Stack frozen crepes in a freezer bag to prevent sticking and keep quality for 1–2 months.
Reheating: Refresh a single layer in a warm nonstick skillet for crisp edges, or microwave an individual crepe for a few seconds to warm through. A quick pan pass restores texture in minutes minscook when needed.
- Keep a serving stack warm in a 175°F oven while you finish the batch.
- Allow a brief room-temperature thaw to ease separation of frozen layers.
- Proper storage protects delicate edges and preserves tenderness for days.
“Rested batter often produces superior results the next day — it streamlines morning prep and improves final texture.”
Troubleshooting: Avoid Rubbery, Thick, or Stuck Crepes
A few careful checks — flour balance, pour, and pan heat — prevent tough, stuck layers.
Choosing the right flour blend and measuring by weight
Measure flour by weight to avoid a gummy mix. Too much xanthan or a heavy starch ratio creates rubbery texture.
Make sure your blend matches the recipe’s intent. If sheets feel chewy, reduce gums next step and retest.
Keeping the pan at medium heat and lightly greased
Maintain steady medium heat so the surface sets quickly without burning. Even nonstick pans need a thin film of fat.
If edges don’t lift within seconds, the pan is probably too cool — preheat a little longer.
Why the first crepe can be a “tester”
Use the first layer to check spread, browning, and release. Adjust heat or greasing based on that single step.
- Make sure to choose an appropriate flour approach and weigh ingredients precisely.
- Keep batter fluid; thin with a splash of milk or water if it pours sluggishly.
- Use a seasoned cast iron skillet or a clean nonstick pan for even browning.
- Pour a thin layer — if it looks like pancakes batter, it’s too thick.
- Rest time matters: insufficient rest weakens sheets and causes tearing.
Quick tip: Treat the first flip as a test and adjust one variable at a time to save batter and time.
Dietary Swaps and Variations
A few measured changes to milk, binder, and flour will keep layers thin and pliable across diets. These swaps protect texture while letting you meet dairy-free, egg-free, or grain-free needs.
Dairy-free: plant milk and vegan butter
Choose unsweetened plant milk such as almond or oat and use a solid vegan butter to mimic richness. Whole milk adds natural fat and tenderness if you use dairy; otherwise the vegan butter keeps edges crisp.
Egg-free experiments
Try a commercial plant-based liquid like Just Egg for consistent binding. For sweet styles, mashed ripe banana can work as a binder but will change texture and flavor. Test small batches to dial in timing and thickness.
Cassava + arrowroot for grain-free batter
Swap a 1.5 cup 1:1 blend with 3/4 cup cassava flour plus 1/2 cup arrowroot to get pliable, thin sheets. Cassava can absorb more liquid, so keep the batter pourable and add a splash of milk as needed.
- Keep batter thin: adjust liquids and rest 1 hour to overnight to hydrate starches—this helps in baking and better release.
- Lightly grease the pan since some substitutions stick more easily.
- Balance sweet savory choices by adding or omitting sugar and vanilla to match fillings.
- Record successful ratios so you can reproduce your favorite dairy-free or egg-free recipe.
“Resting and small, repeatable swaps are the easiest path to consistent, tender crepes.”
Serving, Folding, and Presentation
Arrange your station so fillings, sides, and a warm skillet are within easy reach before you begin plating. That small step keeps layers hot and prevents rushed handling that can tear the sheet.
Folded in halves, rolled, or classic triangles
Three common folds work every time: fold in half for a quick, casual serve; roll for a tidy, portable option; fold into classic triangles for an elegant plate.
When you roll, add filling in a thin strip along the bottom edge, then roll tightly to seal the bottom seam. That keeps the layers neat and compact.
Side ideas: fresh fruit, cheese, or roasted veggies
Pairings should balance texture and flavor. Sweet sides like fresh berries or citrus brighten the plate. Savory sides such as soft cheese or roasted vegetables add savory depth.
- Keep crepes warm in a low oven while assembling multiple plates.
- Stack finished layers on parchment to prevent sticking and preserve presentation.
- Portion fillings modestly so the sheet stays thin and retains a refined look.
- Use a small cup or squeeze bottle to add sauces with precise lines.
- Hold a skillet at low heat to gently rewarm any cooled layers before folding.
Finish with a light sprinkle of cheese over hot layers so it melts without overwhelming delicacy. Arrange mixed sweet and savory sides to create contrast and a complete brunch spread.
“A properly hydrated batter and balanced flour mix create sheets that fold without cracking.”
Conclusion
Mastering thin batter and steady heat turns a nervous first batch into a reliable weekend staple. Keep the batter rested, use a preheated pan, and grease lightly for effortless flips.
Timing matters: cook about 90 seconds on the first side and 30–60 seconds on the second. Both gum‑free blends and 1:1 mixes with xanthan work when measured and rested properly.
A well‑seasoned cast iron or quality nonstick pan makes browning predictable and release smooth. Store finished crepes stacked and wrapped in the fridge 3–5 days or freeze 1–2 months. Reheat briefly to restore tenderness.
Save this crepe recipe and the ingredient ratios. Finish plates with a quick sugar syrup or a dusting of powdered sugar to elevate presentation in minutes, and keep a note of pan, heat, and batter feel for an even better next batch.


