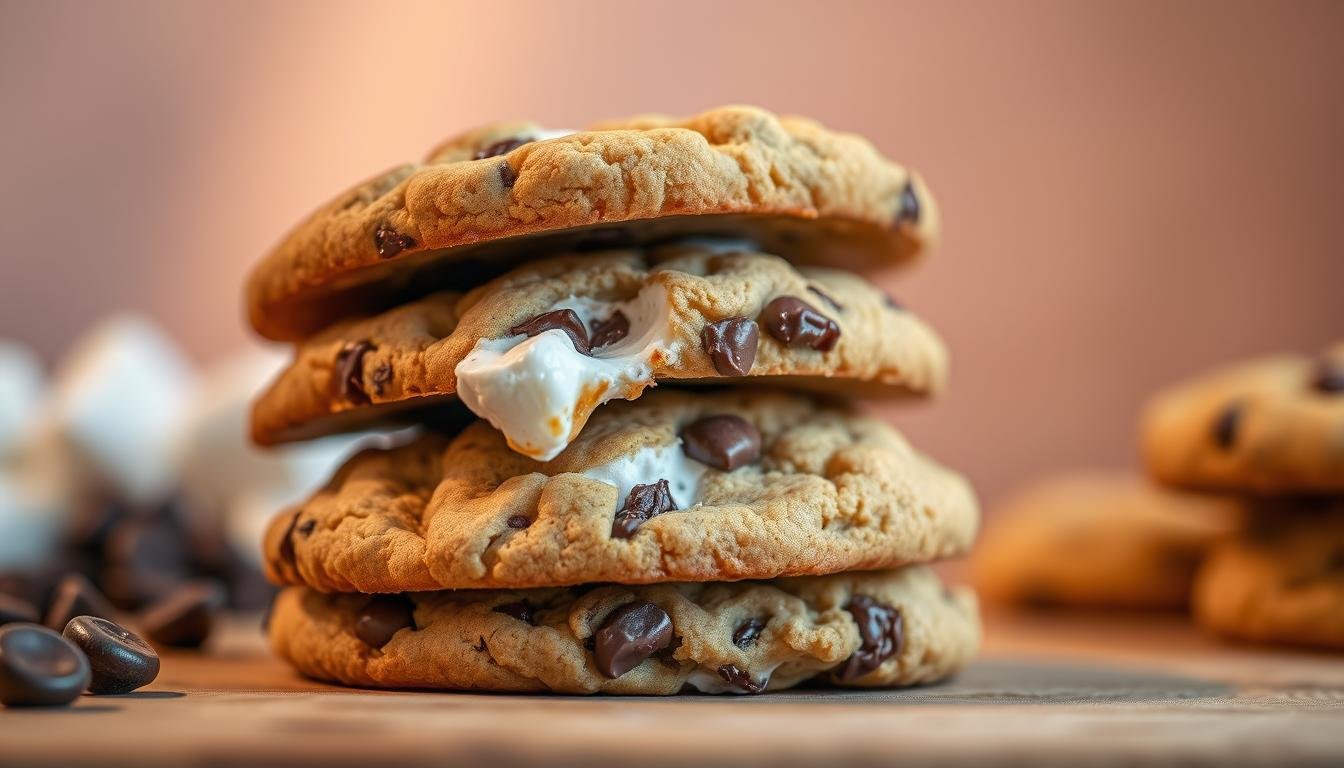

If you’re looking for a dessert that combines chewy goodness with gooey surprises, you’re in the right place. This recipe brings together the best of both worlds: crisp edges and soft centers. No chilling is required, making it perfect for last-minute cravings.
I created this recipe of chocolate chip and marshmallow cookies as a fun twist on classic favorites. It’s beginner-friendly and versatile. You can use chocolate chunks or chips, and it’s great for large-batch baking. Pro tip: try browned butter for a deeper flavor and even marshmallow distribution.
With a 4.96 rating from 66 votes, this recipe is a crowd-pleaser. All you need are basic tools like bowls, a whisk, and a spatula. No mixer is required, so it’s simple and accessible for everyone.
Key Notes;
- No chilling required for quick preparation.
- Crisp edges with soft, gooey centers.
- Versatile recipe for chocolate chunks or chips.
- Perfect for large-batch baking.
- Use browned butter for enhanced flavor.
- Beginner-friendly with basic kitchen tools.
- Highly rated by recipe testers.
Introduction to Chocolate Chip and Marshmallow Cookies
Imagine a dessert that combines the best of s’mores and brownies—this is it. After 10+ years of perfecting this recipe, I’ve created a treat that’s chewy like brownies and crispy like s’mores. It’s a delightful balance of textures and flavors.
This recipe elevates traditional cookies with toasted marshmallow elements. The dark chocolate counters the sweetness of the marshmallow, creating a harmonious flavor profile. It’s inspired by rocky road ice cream but uses everyday pantry staples for simplicity.
One of the best parts? The dough freezes well, making it perfect for spontaneous baking. Whether it’s for holidays, summer BBQs, or lunchbox treats, these cookies are versatile and always a hit.
Here’s why this recipe stands out:
- Texture: Chewy centers with crispy edges.
- Flavor: Dark chocolate balances marshmallow sweetness.
- Convenience: Dough can be frozen for later use.
- Nutrition: At 141 calories per cookie, it’s a guilt-free indulgence.
Store them in an airtight container to keep them fresh. They’re perfect for sharing or enjoying as a quick snack. Give this recipe a try—it’s a crowd-pleaser every time!
Ingredients You’ll Need

Let’s dive into the essential ingredients for this delightful treat. Each component plays a crucial role in achieving the perfect texture and flavor. I’ve broken them down into dry, wet, and mix-ins for easy preparation.
Dry Ingredients
Start with 225g of all-purpose flour, which provides structure. Add ¾ tsp of baking soda for a slight rise and a pinch of salt to balance the sweetness. Pro tip: sift the flour to avoid lumps.
Wet Ingredients
For the wet mix, use 113g of unsalted butter at room temperature. Combine it with ½ cup of brown sugar for moisture and ¼ cup of granulated sugar for crispness. Add 1 egg and 1 tsp of vanilla extract for richness and flavor.
Mix-ins
For the mix-ins, I recommend 1 cup of chocolate chips and ½ cup of mini marshmallows. Dark chocolate works best for a balanced sweetness. Mini marshmallows melt evenly, creating gooey pockets.
| Ingredient | Measurement (Cups) | Measurement (Grams) |
|---|---|---|
| All-purpose flour | 1 ¾ cups | 225g |
| Unsalted butter | ½ cup | 113g |
| Brown sugar | ½ cup | 100g |
| Granulated sugar | ¼ cup | 50g |
| Chocolate chips | 1 cup | 175g |
| Mini marshmallows | ½ cup | 50g |
For best results, use room-temperature ingredients. If you’re short on time, freeze extra dough balls for later baking. Avoid substituting baking soda with baking powder—it’s not the same!
How to Make Chocolate Chip and Marshmallow Cookies

Ready to bake a treat that’s both chewy and gooey? Let’s get started! This recipe is simple, quick, and perfect for beginners. Follow these steps to create a batch of irresistible cookies.
Step 1: Prepare the Dough
Begin by browning the butter. Heat it in a pan until it turns amber and develops foamy bubbles. This adds a rich, nutty flavor to the dough. Let it cool slightly before using.
In a large bowl, mix the flour, baking soda, and salt. In another bowl, combine the browned butter, sugars, egg, and vanilla. Use a whisk or mixer for a smooth consistency. Gradually add the dry ingredients to the wet mix, stirring until just combined.
Step 2: Add the Mix-ins
Fold in the chocolate chips and mini marshmallows. For even distribution, reserve a few marshmallows to press on top of the dough balls before baking. This ensures every bite has a gooey surprise.
Use a cookie scoop or tablespoon to portion the dough into 2-inch balls. Place them on a baking tray lined with parchment paper or a silicone mat. Leave enough space between each ball for spreading.
Step 3: Bake the Cookies
Preheat the oven to 325°F. Bake the cookies for 10-12 minutes, or until the edges are golden and the centers are soft-set. Avoid overbaking to maintain the chewy texture.
After baking, let the cookies cool on the tray for 10 minutes. This helps them set without becoming too fragile. Transfer them to a wire rack to cool completely.
| Step | Time | Temperature |
|---|---|---|
| Prepare Dough | 15 mins | Room Temp |
| Add Mix-ins | 5 mins | Room Temp |
| Bake Cookies | 10-12 mins | 325°F |
With these steps, you’ll have a batch of perfectly baked cookies. Enjoy them warm or store them in an airtight container for later. Happy baking!
Tips for Perfect Cookies

Perfecting your baking skills starts with mastering a few simple techniques. Whether you’re a beginner or a seasoned baker, these tips will help you achieve the best results every time. From chilling the dough to using the right tools, here’s how to elevate your cookie game.
Chill the Dough
Chilling the dough is a game-changer. It prevents spreading and helps maintain the shape of your dough balls. For best results, refrigerate the dough for at least 30 minutes. If you’re in a hurry, the freezer can speed up the process.
Here’s a quick comparison:
| Method | Time | Result |
|---|---|---|
| Refrigerator | 30 mins | Firm dough, minimal spread |
| Freezer | 15 mins | Quick chill, slightly firmer |
Use Parchment Paper
Parchment paper is a baker’s best friend. It ensures even baking and makes cleanup a breeze. Plus, it prevents sticking, so your cookies slide off the tray effortlessly. Always line your baking sheets for consistent results.
Don’t Overbake
Overbaking can ruin the texture of your cookies. To achieve soft centers with crisp edges, bake them just until the edges turn golden. Let them cool on the tray for 10 minutes before transferring to a wire rack. This helps them set without becoming too fragile.
- Calibrate your oven using a thermometer for accurate baking.
- Dust your hands with flour if the dough is sticky.
- Store cookies in an airtight container or freeze for later use.
- Revive stale cookies by microwaving them with a marshmallow for 10 seconds.
With these tips, you’ll bake cookies that are soft, chewy, and perfectly golden every time. Happy baking!
Conclusion
This family-friendly recipe is a hit for both kids and adults alike. To ensure success, focus on proper mixing, precise baking time, and high-quality ingredients. These steps guarantee crisp edges and soft centers every time.
Feel free to customize the recipe! Add nuts or swap in different chocolates for a unique twist. I’d love to see your creations—share them on Instagram and tag @sugarsaltmagic. Don’t forget to leave a rating to let me know how it turned out!
Looking for more? Stay tuned for a cherry chocolate variation coming soon. Store your baked goods at room temperature for up to a week or freeze for three months. This is my kids’ favorite lunchbox treat, and I’m sure it’ll be yours too.
Got questions? Reach out for troubleshooting help. Happy baking!
FAQ
Can I use regular marshmallows instead of mini ones?
Yes, you can! Just chop them into smaller pieces to ensure they mix evenly into the dough.
How do I store these cookies to keep them fresh?
Store them in an airtight container at room temperature. They’ll stay soft and delicious for up to 5 days.
Can I freeze the dough for later use?
Absolutely! Scoop the dough into balls, freeze them on a tray, then transfer to a freezer bag. Bake straight from the freezer, adding a couple of extra minutes to the baking time.
What’s the best way to measure flour for this recipe?
Spoon the flour into your measuring cup and level it off with a knife. This prevents packing too much flour into the dough.
Can I substitute butter with margarine?
I recommend sticking with butter for the best flavor and texture. Margarine can alter the taste and consistency.
Why do I need to chill the dough?
Chilling helps prevent the dough from spreading too much while baking, giving you thicker, chewier results.
How do I know when the cookies are done baking?
The edges should be golden brown, but the centers will look slightly underbaked. They’ll firm up as they cool.
Can I add nuts or other mix-ins?
Definitely! Feel free to customize with nuts, dried fruit, or even pretzels for a fun twist.